
O.k. I admit I pull this post out every other year, but hey, it's a good tutorial, quick, fun, EASY, and cheap! The main instructions are on the Flickr! page accessed via either clicking on the photo, or by clicking on the little Flickr! dookhickey on the right side near the bottom of the page. So without further ado... the DIY tombstone:
Flickr! page tute - click: Tombstones. Scroll down to the tombstone photos and follow the instruction beginning with "a" and finishing up with "g".
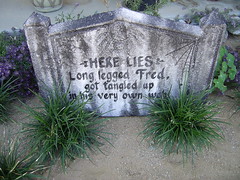
In the "spirit" of Halloween, I spent the afternoon in quiet solitude and carved up some fun! The undertaking? Tombstones!
This is the first of the new tombstones for this year. (2005) This one is 24" wide by 16" high and is made from 1" thick (I originally wrote 1 inch thick...but it's really 2 inches, oops.) foam board insulation that comes in a variety of sizes. (Lowes/Home Depot) I chose the 4'x8' sheets. About $12.00 out the door and into the minivan.
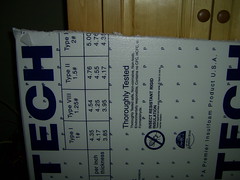
If you are like S'mee, you will need to have the guys on the floor cut it into 2 pieces for you (so it can fit in your vehicle). As you can see in the photo, there are indeed "lines" that one could follow -if they wished to do so- the guys I was working with at the time were less than cooperative and decided to "freehand" it on the totally white side without marks and guidelines. UGH! and GRRR!
Make sure you stress the first cut along the lines, otherwise, like S'mee, you will lose one inch, or more, when they cut it diagonally. again UGH!
O.k. so click on that Flickr! link and get started, seriously, if you work in assembly line fashion, this only takes a few hours and you can whip out an entire graveyard!




 Posts
Posts